Instagram
GTA San Andreas 1 DVD

GTA San Andreas 1 DVD


GTA  San Andreas (Game COMPUTER 3D PC DVD)
(1 DVD)

SYSTEM REQUIREMENTS

Supported Operating Systems are:

                Windows 2000 Professional (Workstation) (plus Service Pack 1 or higher)
                                plus DirectX 9

                Windows XP (Home and Professional) (plus Service Pack 1 or higher)
                                plus DirectX 9


Minimum Hardware Requirements:
               
                1GHz Intel Pentium III or AMD Athlon Processor
                256 MB of RAM
                8 speed DVD-ROM Drive
                3.6 GB of free Hard Disk space for a minimal install
                64 MB Video Card with DirectX 9 compatible drivers
                                ("GeForce3" or better)
                DirectX 9 compatible Stereo Sound Card
                Keyboard
                Mouse


Recommended Hardware Requirements:

                Intel Pentium 4 or AMD Athlon XP processor (or better)
                384(+) MB of RAM
                16 speed DVD-ROM drive
                4.7 GB of free Hard Disk space for a full install
                128(+) MB Video Card with DirectX 9 compatible drivers
                                ("GeForce4" or better)
                DirectX 9 compatible Surround Sound Card
                Game pad with twin axis analogue controls (USB or Joystick Port)
                Keyboard
                Mouse
fahrenheit 1DVD

fahrenheit 1DVD


 fahrenheit (Game COMPUTER 3D PC DVD CD)

 ----------------------------------------

Fahrenheit
Read Me 1.0 for Windows 98SE/ME/2000/XP

----------------------------------------

Congratulations on your purchase of Fahrenheit.

To supply you with up-to-the-minute information, we have included this ReadMe file.

(Please open this window to its maximum size for better readability.)

----------------------------------------

CONTENTS:

1. Introduction
2. System Requirements
3. Prior to Installing the game
4. Windows User Permissions
5. Installation Instructions
6. Running the Program
7. Uninstalling Fahrenheit
8. Known Issues/Incompatibilities
9. Troubleshooting and Tips for Improving Performance
10. Technical Support


1. INTRODUCTION
==================================
Thank you for purchasing Fahrenheit! Below you’ll find the latest information on gameplay changes, manual errata, troubleshooting tips, hints, driver links and Technical Support information.


2. SYSTEM REQUIREMENTS
==================================
Operating System:        Windows® 98SE/Me/2000/XP
Processor:             Pentium® III 800 MHz or faster
Memory:             256 MB RAM
Hard Disk Space:         4.0 GB Free
DVD-ROM Drive:         1x speed or faster
Video:             32 MB Hardware T&L-compatible video card*
Sound:             Windows® 98SE/Me/2000/XP-compatible sound card
DirectX®:             DirectX® version 9.0c (included) or higher

*32 MB video cards with no support of hardware T&L, such as the Nvidia Riva TNT or any Intel integrated video card, are not supported.

3. PRIOR TO INSTALLING THE GAME
==================================
Before installing Fahrenheit, please verify that your computer meets the minimum requirements listed above.

We also recommend preparing your hard drive for installation by running ScanDisk and Disk Defragmenter prior to installation. These utilities are part of Windows and can identify and resolve problems with your disk drive which could hinder installation and/or playing of the game.

To launch these programs and optimize your hard disk drive:
1. Open "My Computer".
2. Right-click the disk drive you wish to install the game onto (usually C:)
3. Select the "Tools" tab.
4. Click "Check Now" to launch Scandisk.

When Scandisk has completed, follow steps 1-3 and click "Defragment Now" to launch Disk Defragmenter.

Note that defragmenting your disk drive can take a long time. It's a good idea to start disk defragmenter and let it run overnight.


4. WINDOWS USER PERMISSIONS
==================================
If you are running Windows 2000 or XP you must be logged in as the Administrator to install Fahrenheit. However, once installed, the game will be available to all other users including those with non-Administrator privileges.

5. INSTALLATION INSTRUCTIONS
==================================
1. Start Windows® 98SE/Me/2000/XP and/or exit all running applications.
2. Place the Fahrenheit DVD into the DVD drive.
3. If AutoPlay is enabled, click the install option on the AutoPlay menu that appears. If AutoPlay is not enabled, or the installation does not start automatically, click on the Start button on your Windows® taskbar, then on Run. Type D:\Setup and click on OK. Note: If your DVD drive is assigned to a letter other than D, substitute that letter.
4. Fahrenheit requires that DirectX 9.0c be installed on your computer. The program will look for DirectX 9.0c. If it does not find it, it will give you the opportunity to install DirectX 9.0c from the DVD during the game installation process.
5. Follow the remainder of the on-screen instructions to finish installing the Fahrenheit game.


6. RUNNING THE PROGRAM
==================================
Place Fahrenheit DVD in the drive from which you installed the game. Follow the Autorun prompt for playing the game.

Or:

1. Click on the Windows START button.
2. Click on PROGRAMS.
3. Click on Atari.
4. A submenu will open. Click on Fahrenheit; the start-up screen will appear. Follow the on-screen prompt.

Note: You must have the Fahrenheit game disc in your DVD drive to play.


7. UNINSTALLING Fahrenheit
==================================
1. Click on the Windows START button.
2. Click on PROGRAMS.
3. Click on Atari.
4. Click on Fahrenheit.
5. Click on uninstall. Follow the on-screen prompt.

Or choose the option add/remove program from your windows menu.

Please note that the save files are stored under the following location "user\mydocuments\atari\Fahrenheit Profile. They can’t be removed by the automatic uninstaller process and need to be deleted manually.


8. KNOWN ISSUES / INCOMPATIBILITIES
====================================

***If you experience any graphical problems, please install the latest video drivers available for your video card.

***If you experience any sound problems, please install the latest sound drivers available for your sound card.

Links to the most popular video and sound card manufacturers are available in the TROUBLESHOOTING AND TIPS FOR IMPROVING PERFORMANCE section.


INPUT DEVICES

*If your PC is running Windows 98SE, and you have the LOgitech Gaming Software installed, you may experience difficulty remapping your controller buttons if you are using the following gamepads:

Logitech® Dual Action™ Gamepad
Logitech® Rumblepad™ 2 Vibration Feedback Gamepad
Logitech® Cordless Rumblepad™ 2
Logitech® Cordless RumblePad™
Logitech® Wingman RumblePad™

As a workaround try uninstalling the Logitech Gaming Software but you may lose vibration support. We are currently working on a solution and will update everyone once a solution is found.

*If your PC is running Windows ME, and you have the LOgitech Gaming Software installed, you may experience difficulty remapping your controller buttons if you are using the following gamepads:

Logitech® Dual Action™ Gamepad
Logitech® Rumblepad™ 2 Vibration Feedback Gamepad
Logitech® Cordless Rumblepad™ 2
Logitech® Cordless RumblePad™
Logitech® Wingman RumblePad™

As a workaround try uninstalling the Logitech Gaming Software but you may lose vibration support. We are currently working on a solution and will update everyone once a solution is found.


VIDEO DEVICES

* As is noted in the minimum requirements not all video cards have hardware transform and lighting support even though they have the required video memory available. Here is a non-exhaustive list of video cards that are not supported:

ATI Rage 128
ATI Radeon

Intel 82810 Integrated Graphics
Intel 82815 Integrated Graphics
Intel 82830M Integrated Graphics
Intel 82845G Integrated Graphics
Intel 82852 Integrated Graphics
Intel 82855 Integrated Graphics
Intel 82910GL GMA 900 Integrated Graphics
Intel 82915G GMA 900 Integrated Graphics
Intel 82915GV GMA 900 Integrated Graphics

Intel 82855GM Extreme Graphics 2
Intel 82865G Extreme Graphics 2
Intel 82865GV Extreme Graphics 2

Mobile Intel 915GM/GMS Express Integrated Graphics
Mobile Intel 910GML Express Integrated Graphics

Nvidia TNT 2

Matrox G400
Matrox G450
Matrox G550

If you have any of these video cards please contact your system vendor for assistance in upgrading your video card.


9. TROUBLESHOOTING AND TIPS FOR IMPROVING PERFORMANCE
========================================================
1. Drivers: The latest drivers for video and sound drivers can be found at the following URLs -

Latest NVIDIA Drivers:
    http://www.nvidia.com

Latest ATI Drivers:
    http://www.ati.com
  
Latest Matrox Drivers:
    http://www.matrox.com

Latest Creative Labs Drivers:
    http://www.creative.com
  
Latest Hercules Drivers:
    http://www.hercules.com

Latest DirectX Runtime:
    http://www.microsoft.com/windows/directx/downloads

2. The game runs best with Windows 2000 and Windows XP because it uses asynchronous mechanism of loading. Users can upgrade their OS to Windows 2000 or XP if they want to improve loadings.

10 TECHNICAL SUPPORTS
=========================
Please refer to your manual back cover to get the appropriate helpline number.


© 2005 Atari Interactive, Inc. All Rights Reserved. All trademarks are the property of their respective owners.
Developed by Quantic Dream.
Uses Bink Video Technology. Copyright © 1997-2005 by RAD Game Tools, Inc.

DESIGNED, WRITTEN AND PRODUCED BY QUANTIC DREAM.
Crysis 2DVD

Crysis 2DVD


Crysis 2DVD (Game COMPUTER 3D PC DVD CD)

 ==================================================================
Legal Information
==================================================================

THIS SOFTWARE IS PROVIDED AS IS WITHOUT WARRANTY OF ANY KIND,
WHETHER EXPRESS OR IMPLIED, INCLUDING WARRANTIES OF
MERCHANTABILITY AND FITNESS FOR A PARTICULAR PURPOSE WHICH ARE
HEREBY DISCLAIMED. IN NO EVENT WILL ELECTRONIC ARTS BE LIABLE FOR
ANY SPECIAL, INCIDENTAL, OR CONSEQUENTIAL DAMAGES RESULTING FROM
POSSESSION, USE, OR MALFUNCTION OF THIS ELECTRONIC ARTS SOFTWARE
PRODUCT.

SOME STATES DO NOT ALLOW LIMITATIONS AS TO HOW LONG AN IMPLIED
WARRANTY LASTS AND/OR EXCLUSIONS OR LIMITATIONS OF INCIDENTAL OR
CONSEQUENTIAL DAMAGES SO THE ABOVE LIMITATIONS AND/OR EXCLUSIONS
OF LIABILITY MAY NOT APPLY TO YOU.  THIS WARRANTY GIVES YOU
SPECIFIC RIGHTS, AND YOU MAY ALSO HAVE OTHER RIGHTS WHICH VARY
FROM STATE TO STATE.

ELECTRONIC ARTS RESERVES THE RIGHT TO MAKE IMPROVEMENTS IN THIS
FILE AND TO THE SOFTWARE AT ANY TIME AND WITHOUT NOTICE.

THIS FILE AND THE SOFTWARE HEREWITH IS COPYRIGHTED. ALL RIGHTS ARE
RESERVED. NO PART OF THIS FILE OR THE SOFTWARE MAY BE COPIED,
REPRODUCED, TRANSLATED, OR REDUCED TO ANY ELECTRONIC MEDIUM OR
MACHINE-READABLE FORM WITHOUT THE PRIOR WRITTEN CONSENT OF
ELECTRONIC ARTS.


======================================
Crytek GmbH Copyright
======================================
Software and documentation © 2007 Crytek GmbH.

ALL RIGHTS RESERVED.


==================================================================
Crysis(R)
ReadMe File - September, 2007
==================================================================

Thank you for purchasing Crysis. This ReadMe file contains
information that may be of use before proceeding into battle.

==================================================================
System Requirements
==================================================================

Crysis requires DirectX 9.0c. You can install DirectX 9.0c by
following the onscreen prompts during the game's installation
process.

REQUIRED SYSTEM SPECIFICATIONS:

OS: Windows XP or Windows Vista

Windows XP:

   · CPU: Intel P4 2.8 GHz / AMD Athlon 2800+ / Intel Core 2.0 GHz
     or higher

   · RAM: 1.0 GB

   · Hard Drive: 12 GB or more of free space

   · Video: NVIDIA 6800 GT 256 MB / ATI 9800 Pro or better

   · Sound: DirectX 9.0c compatible sound card

Windows Vista:

   · CPU: Intel P4 3.2 GHz / AMD Athlon 3200+ / Intel Core 2.2 GHz
     or higher

   · RAM: 1.5 GB

   · Hard Drive: 12 GB or more of free space

   · Video: NVIDIA 6800 GT 256 MB / ATI X800 Pro 256 MB or better

   · Sound: DirectX 9.0c compatible sound card

Multiplayer:

   · 2 to 32 players, network or Internet connection
     required (512Kbps Cable, DSL, or faster connection)

Note: While you will be able to play Crysis with the specifications
above, play experience may improve if you have additional RAM, a
faster CPU or a better graphic card. Please refer to the section on
Optimizing Graphical Performance in this ReadMe file for more
information.

==================================================================
Installation Instructions
==================================================================

IMPORTANT: Before running Crysis, please be sure you have the latest
drivers for both your video card and your audio card installed.
An outdated video or sound driver can lead to slow and choppy
gameplay, or in some cases can prevent the game from running at all.
You can download the appropriate drivers from your video and audio
card manufacturer's Web site.

DVD
---

Avoid running any other programs in the background, as this may
conflict with the game. This includes any virus-protection
program that you have running, which can hinder performance.

For all other users, to install Crysis in Windows XP or Windows
Vista:

  1. Insert the Crysis disc into your DVD-ROM drive.

     If the disc does not automatically launch when inserted in
     the drive, you may have the AutoPlay feature disabled. To
     enable AutoPlay, please consult your Windows user manual.

     If you are unable or do not wish to activate AutoPlay,
     please browse to the location of the Crysis DVD-ROM using
     Windows Explorer, and double-click the "Setup" application
     in the root directory.

  2. Follow the instructions that appear.

Direct Download
---------------

  1.  Wait until the installer has finished downloading.

  2.  Agree to run the installer executable.

  3.  Follow the instructions that appear.

PLEASE NOTE that you must register Crysis when prompted to do so
during the installation process in order to play the game
online.
You can register the game at a later time by clicking the "Register"
button in the game's Online menu.

Note: Users without Service Pack 2 installed might see the following
error message at the end of the installation process:

"Can't add the game to Windows Firewall. Do you want to continue
with the installation?"

Answer in the affirmitive, PunkBuster functionality will not be
affected.


==================================================================
Sandbox2 Editor Installation
==================================================================

Crytek’s Sandbox2 ‘What you see is what you play’ level editor comes
free with Crysis.

To install the editor browse to the \Sandbox2 folder on your DVD-ROM
using Windows Explorer, and run the "CryEngine 2 Sandbox" installer.

In order to install and use the Crysis(R) Sandbox Editor on Windows
Vista(TM) it is necessary to disable User Account Control (UAC). To
disable UAC, follow these steps:

1) Go to Start \ Control Panel \ User Accounts

2) Click the "Turn user account control on or off" option

3) Click continue on the UAC popup

4) Uncheck the box next to "Use user account control (UAC) to help
protect my computer"

5) Click OK


==================================================================
Uninstalling
==================================================================

To uninstall Crysis if your operating system is Windows XP:

  1. Click the "Start" button in the Windows taskbar.
  2. Click "Control Panel" in the Start menu.
  3. Double-click "Add or Remove Programs".
  4. Click "Crysis" in the program list and click the "Remove"
     button next to its name.
  5. Follow the instructions that appear.


To uninstall Crysis if your operating system is Windows Vista:

  1. Click the "Start" button in the Windows taskbar.
  2. Click "Control Panel" in the Start menu.
  3. Click "Uninstall a program" under the "Programs" heading.
  4. Double-click "Crysis" in the program list.
  5. Follow the instructions that appear.


==================================================================
Troubleshooting
==================================================================

Please be aware that an outdated video driver or sound driver can
lead to slow and choppy gameplay, or in some cases can prevent
the game from running at all. To ensure an enjoyable experience
with this game, be sure that you have the most recent video and
sound drivers installed. These drivers are typically available
for download from your system or hardware manufacturer's Web
site. If you are not sure what type of video or sound card you
have, or you need assistance with updating the drivers on your
system, please refer to the documentation that came with your
system or peripheral.

For additional help with troubleshooting, visit the community
forums at the official Web site for Crysis at:

     http://www.ea.com/crysis/


==================================================================
Saved Games and Screenshots
==================================================================

In Windows XP, saved game files, and captured screenshots for Crysis
are stored in the "Crysis" folder. In Windows Vista, saved game files
are stored in a different location--see below.

To access the "Crysis" folder, click the "Start" button in the
Windows taskbar, then click "My Documents" in Windows XP or
"Documents" in Windows Vista.

In Windows Vista, saved game files are usually stored in the following
location:

C:\Users\<your login name>\Saved Games\Crysis

To access this folder, click the "Start" button in the Windows
Taskbar, then click "My Computer" in the Start menu. Then
navigate to the folder.

==================================================================
Optimizing Graphical Performance
==================================================================

For a good gameplay experience you generally want to have a fast
and stable frame rate. Additionally, it's good to have quick
response on user input.

Crysis is made for high image quality and runs best with a
powerful main processor, a lot of main memory, and a powerful
graphics card with a lot of video memory. The performance can be
limited by one or more of the above mentioned points. By default
the game prefers settings for better performance which means
many options in the menu go to low quality mode. However if
hardware allows, this can be changed by the user. By adjusting
graphical settings you can find a good compromise for your
computer. Some very high quality features can only be accessed
when running on DirectX 10 which requires Windows Vista. Features
which are not accessible appear grayed out.

It is advisable to have the latest graphic card drivers as the
hardware vendors often include optimizations for specific games
into their drivers. Some graphics card settings in the Windows
display settings can affect performance or quality.
Windows Vista is a bit more demanding on hardware side and drivers
can be less optimized. This makes it even more necessary to get
recent drivers and hardware running well on Vista. Memory
management within Windows Vista has changed a bit which makes it
more memory demanding. Microsoft released a patch to improve this
situation. More details and the download can be found there:

    http://support.microsoft.com/kb/940105

Modern processors now support 64bit which mostly improves their
memory managing capabilities. This feature is only available if
the operating system support 64bits. As Crysis is demanding in its
memory requirements it can benefit from a 64bit OS. On a 64bit system
the engine texture streaming can be disabled as the operating
system can handle all data in a level. 64bit also supports more
main memory available for each application. Both are beneficial and
can result in improved frame rate and frame rate stability.

Multiple processors allow processing of some tasks in parallel which
mostly improves computational heavy situations like explosions.
The game utilizes multiple processors automatically.

Some hardware vendors have solutions to utilize multiple graphic
cards in parallel (e.g. Crossfire or SLI) and that can greatly improve
render performance. This requires the engine to run in the
"MultiGPU" mode. The speedup depends on the scene and system
properties like the main processor performance. Frame rate can be
less stable but is often much higher.

The screen resolution is one of the most critical options for
performance and quality. For best quality on a TFT it's best to
pick a resolution which fits the hardware resolution (check your
monitor manual). Generally a higher resolution gives better
quality but requires more memory and renders slower. However, this
depends on the hardware configuration and sometimes increasing the
resolutions does not even affect performance.

Crysis features soft real-time shadows which play an important
role in the image look. Shadows can be activated and deactivated
in the advanced options menu.

Crysis also features HDR rendering which can be activated via the
shading quality in the advanced options menu. In HDR mode you can
notice bright image areas not appearing burned out. You can also
notice the eye adapting to the brightness of the environment.
Deactivating HDR can give you higher frame rates as it requires
more graphics card performance and graphics card memory.

Anti aliasing is a hardware feature to improve image quality.
Edges become softer and lower resolutions can look quite
acceptable. The hardware feature works for most engine techniques
but some graphical features like atmospheric effects may appear
slightly different.

If your graphics card supports multiple monitors you might not get
full 3D acceleration on each display. This can be avoided by only
activating one display in the driver control panel.

To get a stable frame rate you should make sure your computer is
not busy with other tasks such as virus scans or downloading files.

Vertical Sync is a graphical option you can choose in your graphics
card driver. Switching this option off gives you best frame rate
but the image quality might suffer and the image may appear torn
apart. This is mostly noticeable when doing a quick horizontal
camera rotation. For benchmarking, this option is usually switched
off.

Modern TFT monitors have short response times and other features
which help when the eye is following fast paced action.

Input devices need to submit their data in some rate and with a
better connection (serial, PS2, USB) or better hardware you can
get a faster rate. This can result in improved response time and
an improved game experience.


==================================================================
Known Issues
==================================================================

1 ) Audio in Crysis is stereo although I selected a multi-speaker
mode in the Control Panel:

On selecting certain speaker modes in the Control Panel’s Audio
settings which are not supported by the sound card driver, Crysis
will switch to stereo as a fallback. This happens most likely on
selecting "Surround sound speakers" (5.0), or 7.1 speaker mode.

These outputs will be in the log:

Sound - initializing FMOD-EX now!

[Error] <Sound> Sound-FmodEx-AudioDevice: event system init failed!
(56) Error creating hardware sound buffer.

Sound - initialized FMOD-EX with stereo fallback


Resolution: Go to Control Panel -> Sound and Audio Devices ->
Volume tab -> Advanced button in Speaker settings field and choose a
different speaker mode.

2) There is a delay between action and audio (eg. shooting a weapon):

Most likely the user has turned hardware acceleration off by changing
the performance slider in the advanced audio playback settings.
Because DirectSound uses a larger buffer size of 200ms Crysis will
adapt its buffer resulting sounds to being slightly delayed.

Resolution: Go to Control Panel -> Sound and Audio Devices ->
Audio tab -> Advanced button in Sound Playback field ->
Performance tab and set the performance slider all the way to "full".

3) Intro movies and the MP tutorial have no sound:

Most likely the user has turned hardware acceleration off by changing
the performance slider in the advanced audio playback settings. The
video codec cannot create sounds with these settings so audio for the
movies are being disabled.

Resolution: Go to Control Panel -> Sound and Audio Devices -> Audio tab ->
Advanced button in Sound Playback field -> Performance tab and set the
performance slider all the way to "full".

4) Users running AVG anti virus prior to version 7.5 may experience false
positives with Crysis.exe. This can be fixed by upgrading your AVG client
to 7.5 or above.


==================================================================
NAT/Firewall
==================================================================

Game Port Usage

For all traffic between server and client 'game' port is used
(default 64087).

                                                                                 Ports
SDK        Service                  Hostname                            Type  Local  Remote

Server:

Available  hbmaster3                crysis.available.gamespy.com        UDP   Any    27900
NN         natserver1               natneg1.gamespy.com                 UDP   game   27901
NN         natserver2               natneg2.gamespy.com                 UDP   game   27901
NN         nat neg                  Game client                      UDP   game   game*(other game)
QR2        hbmaster3                crysis.master.gamespy.com           UDP   game   27900
QR2        Incoming queries         Game client                         UDP   game   Any
CDKey      keymaster                key.gamespy.com                     UDP   game   29910
ATLAS      Stats auth               crysis.auth.pubsvs.gamespy.com      TCP   Any    Any (def:443)
ATLAS      Stats                    crysis.comp.pubsvs.gamespy.com      TCP   Any    Any (def:80)
SAKE       Profile settings/stats   crysis.sake.gamespy.com             TCP   Any    Any (def:80)

Client:(additionally)

Chat       Any IRC server           peerchat.gamespy.com                TCP   Any    6667
GP         gpmanager                gpcm.gamespy.com                    TCP   Any    29900
GP         searchmanager            gpsp.gamespy.com                    TCP   Any    29901
SB         gmaster3                 crysis.ms5.gamespy.com             TCP   Any    28910
SB         Server queries           game servers                        UDP   Any    game*(target server)

Default value for 'game' is 64087 (can be adjusted).
For incoming UDP traffic, only port "game" ( default 64087)
is required to be opened.

==================================================================
*Administrator Privileges
==================================================================

Please note that you may not be able to add Crysis to your software
firewall's exceptions list if you are not logged in as an administrator
in Windows. You will either need to do so from an account that has
administrator rights, or add your existing account to the
administrators list.

To do so, do the following:

In Windows XP,
  1. Log out of Windows and log in with an Administrator account.
  2. Once logged in, click on "Start" in the Windows taskbar.
  3. Click "Settings".
  4. Click "Control Panel".
  5. Click "User Accounts".
  6. Select the "Users" tab.
  7. Under "Users for this computer:" click on your account name.
  8. Click  "Properties".
  9. Select the "Group Membership" tab.
  10. Select the "Other" radio button.
  11. From the pulldown menu, select "Administrators".
  12. Click "Apply" and then "OK".

In Windows Vista,
  1. Log out of Windows and log in with an Administrator account.
  2. Click the "Start" button in the Windows taskbar.
  3. Click "Control Panel".
  4. Click "Change account type" under the "User Accounts" heading.
  5. Under "Users for this computer:" click on your account name.
  6. Click "Properties".
  7. Select the "Other" radio button.
  8. From the pulldown menu, select "Administrators".
  9. Click "Apply" and then "OK".


==================================================================
Audio Information
==================================================================

If some of the audio in the game seems to be missing, this is likely
due to your speaker settings. If your speaker settings are set to a
surround-sound configuration, but you do not have a surround-sound
speaker system, then some audio channels will not be heard during
gameplay.

To check and adjust your speaker settings:

  1. Click the "Start" button in the Windows taskbar.
  2. Choose "Control Panel".
  3a. If your Control Panel is in the default Category View, click
  "Sounds, Speech, and Audio Devices". Then click "Sounds and
  Audio Devices".
  3b. If your Control Panel is in Classic View, double-click
  "Sounds and Audio Devices".
  4. Under the "Speaker settings" heading, click "Advanced".
  5. Choose the correct configuration in "Speaker setup" drop-down
  menu.
  6. Click "OK".

This should resolve the issue.

==================================================================
End of ReadMe File.
==================================================================
Colin McRae Dirt 2

Colin McRae Dirt 2


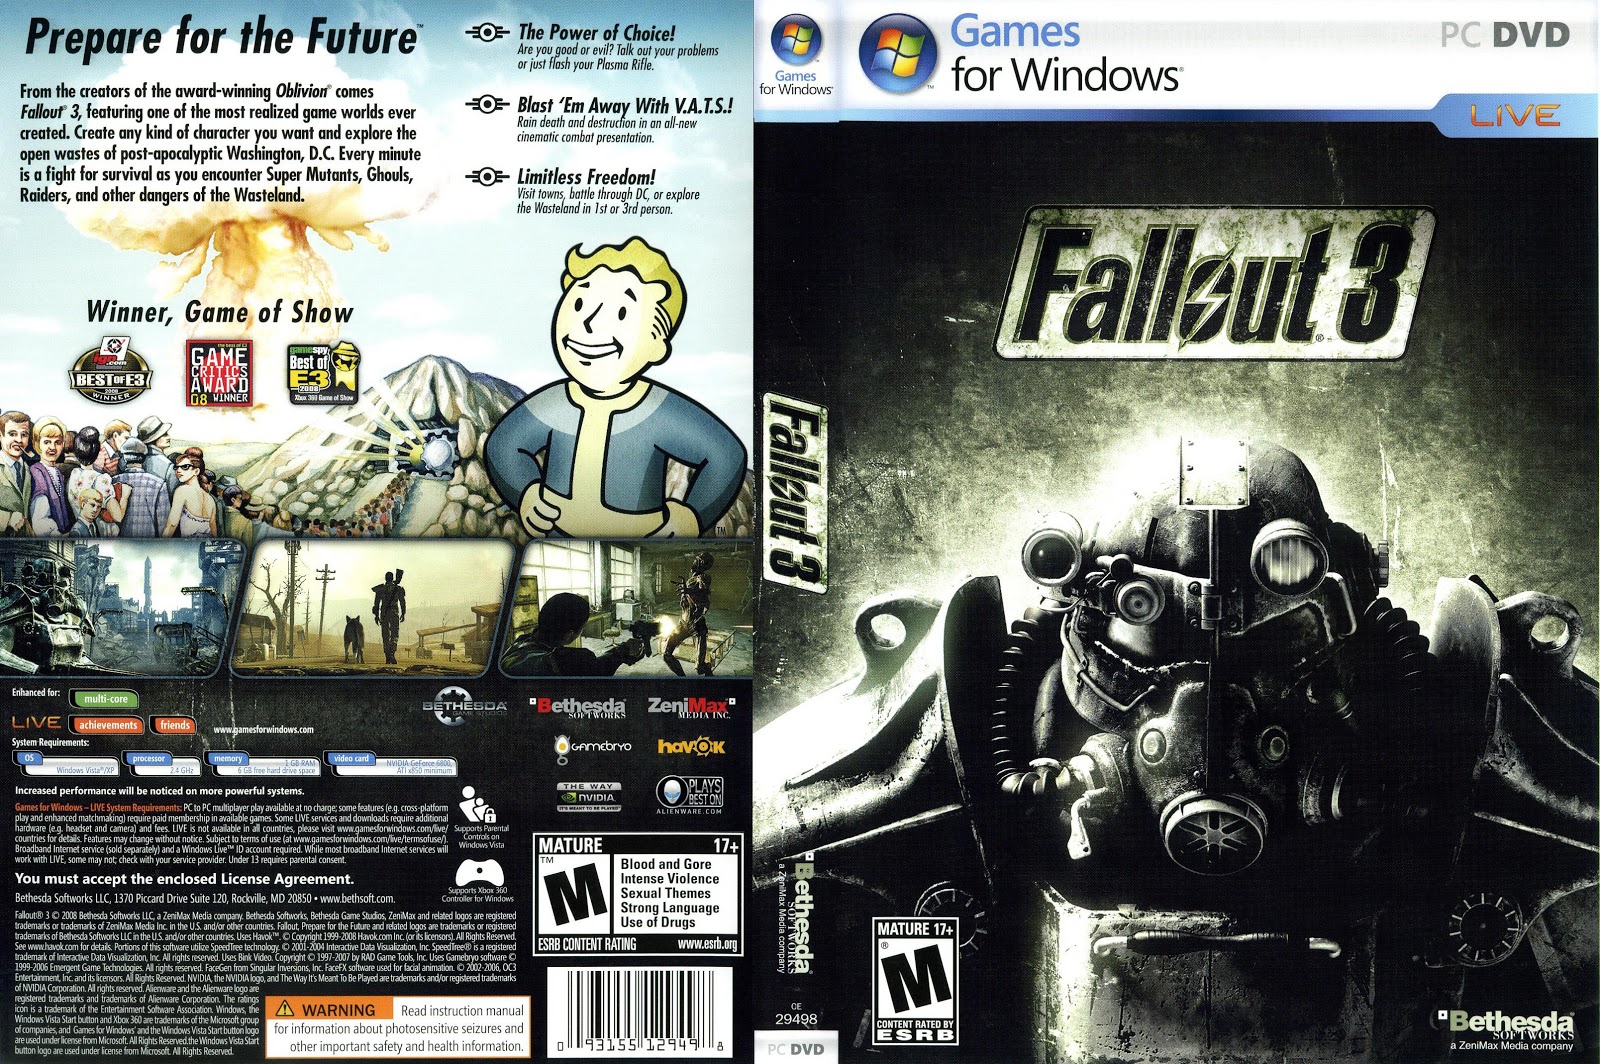
FALLOUT 3

FALLOUT 3

*****************************************************************


                           FALLOUT 3
          
           
*****************************************************************

Index:
1. General Issues
2. Performance Tuning
3. System Requirements

*****************************************************************

     1. General Issues

*****************************************************************


-Saved Games
    Your saved games are located in your \My Documents\My Games\Fallout 3 directory.

-Prior to Installing the Game
    Before attempting to install Fallout 3, please verify that your computer meets system requirements.
   
    We also recommend that you prepare your hard drive for installation by running ScanDisk and Disk Defragmenter prior to installation. These utilities are part of Windows® and can identify and resolve problems with your disk drive which could hinder installation and/or playing of the game.
   
    To launch these programs and optimize your hard disk drive:
   
       1. Open "My Computer".
       2. Right-click the disk drive you wish to install the game onto (usually C:).
       3. Click on "Properties".
       4. Select the "Tools" tab.
       5. Click "Check Now" to launch Scandisk.
       6. When Scandisk has completed, follow steps 1-3 and click "Defragment Now" to launch Disk Defragmenter.
   
-Remapping Your Controls
    You can remap your controls while playing by selecting SETTINGS, CONTROLS, ACTION MAPPING. There are separate controls for each input device you have. You can have actions tagged to multiple devices. So if you want to remap an action to one of your mouse buttons, select DEVICE to change to the mouse settings in the bottom right corner of the screen.


*****************************************************************

     2. Performance Tuning

*****************************************************************

There are several things you can do to increase game performance.

-Make sure you have no other programs running in the background.

-In the Fallout 3 Launcher, select OPTIONS:
    *Lower the Resolution
    *Turn Antialiasing OFF
    *Turn Anisotropic Filtering OFF
    *Set Detail settings to MEDIUM or LOW. Select Advanced for more detail options.
    *Turn all water options to LOW or OFF.
    *Set Screen Effects to NONE.

-While running the game, go to the SETTINGS menu and select DISPLAY.
    *Reduce the FADE distance sliders for Actor, Item, Object, Grass, Shadow, Light, Specularity, OBject LOD or Tree LOD


*****************************************************************

     3. System Requirements

*****************************************************************

-Minimum System Requirements:
* Windows XP/Vista
* 1GB System RAM (XP)/ 2GB System RAM (Vista)
* 2.4 Ghz Intel Pentium 4 or equivalent processor
* Direct X 9.0c compliant video card with 256MB RAM (NVIDIA 6800 or better/ATI X850 or better)

-Recommended System Requirements:
* Intel Core 2 Duo processor
* 2 GB System RAM
* Direct X 9.0c compliant video card with 512MB RAM

-Supported Video Card Chipsets:
ATI HD 4800 series
ATI HD 4600 series
ATI HD 3800 series
ATI HD 3600 series
ATI HD 3400 series
ATI HD 2900 series
ATI HD 2600 series
ATI HD 2400 series
ATI X1900 series
ATI X1800 series
ATI X1600 series
ATI X1300 series
ATI X850 series

NVIDIA GeForce 200 series
NVIDIA Geforce 9800 series
NVIDIA Geforce 9600 series
NVIDIA Geforce 8800 series
NVIDIA Geforce 8600 series
NVIDIA Geforce 8500 series
NVIDIA Geforce 8400 series
NVIDIA Geforce 7900 series
NVIDIA Geforce 7800 series
NVIDIA Geforce 7600 series
NVIDIA Geforce 7300 series
NVIDIA GeForce 6800 series


VIDEO
-Regardless of your video card, make sure to download the latest drivers from your manufacturer.

INPUT
-ALT+TAB may cause some game instability with some hardware configurations and is not advised.
ghost recon advanced warfighter 1 DVD

ghost recon advanced warfighter 1 DVD


ghost recon advanced warfighter

1 DVD

Ubisoft
Ghost Recon Advanced Warfighter
README.TXT


Contents

################################################################################

1. Installation Instructions
1.1. System Requirements
1.2. Installation
1.3. Uninstallation
2. Gameplay Instructions
2.1. Game Setup
2.2. Default Keys
2.3. Playing on Gamespy
3. Troubleshooting
3.1. Installing Video Drivers
3.2. Installing Audio Drivers
3.3. Installing DirectX 9.0c
3.4. Bugs and Comments
3.5. Manual Errors
3.6. Manual Addendum
4. Useful Web Sites, Contact Information and Technical Support
4.1. Technical Support
4.2. Useful Web Sites
5. Legal Information
6. Copyright

################################################################################

1. Installation Instructions

################################################################################

1.1. System Requirements

Minimum:
  Processor: Intel or AMD, 2 GHz
  Operating System: Windows 2000/XP
  Memory: 1024 MB RAM
  Disk Space: 4.5 GB
  Graphics Card: 128 MB DX9.0c compatible card,
     GeForce 6200 or higher
     Radeon 9600 or higher
  Sound Card: DirectX 9.0c compatible
  CD-ROM or DVD-ROM drive : x2 read speed
  DirectX Version: 9.0c
  Network: High-speed modem with 64 Kbits of data transfer upload rate for a client, 512Kbits of data transfer upload rate for a server on a full game.

Recommended Configuration:
  Processor: Intel or AMD 2.8 GHz
  Operating System: Windows 2000/XP
  Memory: 1024 MB RAM
  Disk Space: 4.5 GB
  Graphics Card: 256 MB DX9.0c compatible card,
  Sound Card: DirectX 9.0c compatible
  CD-ROM or DVD-ROM drive : x2 read speed
  DirectX Version: 9.0c
  Network: High-Speed Modem with 128 Kbits of data transfer upload rate for a client, 512Kbits of data transfer upload rate for a server on a full game.

Graphics Cards Supported:
  Radeon 9600
  Radeon 9700
  Radeon 9800
  Radeon X300
  Radeon X600
  Radeon X800
  Radeon X1600
  Radeon X1800
  Radeon X1900

  GeForce 6200
  GeForce 6600
  GeForce 6800
  GeForce 7800

If you experience problems, consult paragraph 4.1.

--------------------------------------------------------------------------------
1.2. Installation

The game is made up of 1 DVD or 4 CDs, titled as follows:

  1) CD 1
  2) CD 2
  3) CD 3
  4) CD 4

CD 1 is the Installation and game CD.
To install Ghost Recon Advanced Warfighter, insert CD 1 or the DVD in your CD-ROM/DVD-ROM drive. The setup begins automatically. Using the mouse, click on the installation button and follow the onscreen instructions. You must type
in the CD-key located inside your game copy.

Once the game is installed, launch Ghost Recon Advanced Warfighter, from the Start menu and remember to put CD 1
or the DVD in your drive, otherwise the game will refuse to launch.

--------------------------------------------------------------------------------
1.3. Uninstallation

To uninstall Ghost Recon Advanced Warfighter, follow this simple step:
Select Ghost Recon Advanced Warfighter from the Start menu.
Click the uninstall option and follow the on-screen directions.


################################################################################

2. Gameplay Instructions

################################################################################

--------------------------------------------------------------------------------
2.1. Game Setup

The Setup and Diagnosis application launched at the first launch of the game automatically sets up the game for optimum running on your system.


--------------------------------------------------------------------------------
2.2. Default keys

The game is installed with a default set of control keys which you can change in the Option / Controls menu in the game.

--------------------------------------------------------------------------------
2.3. Playing on Gamespy

To play on game, open the Multiplayer page in the game main menu, and click the Internet tab. Click the Gamespy nickname field down below, and click the Create Account button. Type in the information for the account (nickname and password must have a minimal length of 3 characters) and click the OK button (you can click the Auto login button to automatically join Gamespy any time you enter the Internet page. European Union users will have to validate the 2 buttons in the next panel to proceed with their account creation.

The login is only accepted if you are the only owner of package CD-Key logged at this time.
Once you are logged in, you can update the list of servers available on the Internet and pick one of your choosing.

You may experience difficulty connecting to Gamespy if a firewall or anti-virus blocks the following ports:

Local Ports   
UDP     15250     
UDP    13139   
UDP    15250   

Remote Ports
UDP    15250
TCP    80
TCP    6667
UDP    13139
UDP    27900
UDP    27901
TCP    28910
TCP    29900
TCP    29901
UDP    29910
TCP    29920


################################################################################

3. Troubleshooting

################################################################################

3.1. Installing Video Drivers

If you experience any graphical problems, please install the latest video drivers available for your video card. Links to the most popular video card manufacturers are available at the bottom of this document.

--------------------------------------------------------------------------------
3.2. Installating Audio Drivers

If you experience any sound problems, please install the latest audio drivers available for your sound card. Links to the most popular sound card manufacturers are available at the bottom of this document.

--------------------------------------------------------------------------------
3.3. Installing DirectX 9.0c

Ghost Recon Advanced Warfighter needs DirectX 9.0c or higher to run properly. To get the latest version of DirectX, please visit:
http://www.microsoft.com/windows/directx

--------------------------------------------------------------------------------
3.4. Bugs and Comments

Video refresh rate:
Always select the highest refresh rate supported by your monitor. This
 ensures a more fluid and visually pleasing game.

**** Sound Compatibility ****

Use of HeadSet (Headphones/Microphone):

- Depending on the setup (operating system + DirectX), it
 may be necessary to change the hardware acceleration (setup panel > sound > audio > sound reading > advanced).
- Some drivers apply an effect to sounds read by the PC. For some setups, this may interfere with the operation of the sound engine.
- With some cards, a half-duplex/full-duplex manual setup is possible. For this game, the card should be set up for full-duplex.
- As far as the headset is concerned, if the Internet connection is poor, there is a risk of interference or breaks in voice communication during the game.
- It is often possible to configure sound cards so that they only put out the sound signal on their digital output. In this event, you should check that this is compatible with the audio equipment used (you should use a digital amplifier connected to the digital output). See the sound card manual.
- Check that the input/output cables are correctly connected (2 cables to connect when using a headset). Do not forget that sometimes there is a volume control or a switch for the microphone on the headset lead.


**** Graphics Compatibility ****


- If the game is very slow, or the display corrupted, check that anti-aliasing is not forced at the level of the drivers. If this is the case, deactivate it.
- If your monitor switches to Energy Saving, update the drivers for your screen.


**** Network Compatibility ****

Problems with Firewalls
If you have a firewall on your Internet connection, check the "Playing on Gamespy" paragraph.

**** Hardware Compatibility ****

Motherboard drivers and BIOS settings:
If your computer does not respond, check that your motherboard drivers are up-to-date. If you have carried out changes to BIOS and the game crashes, try restoring the default settings (or security settings).


****Sticky-keys ****

It is recommended to deactivate the sticky-keys when playing. (Control Panel -> Accessibility Options -> Keyboard -> Use sticky keys should be unchecked).
Windows Updates while playing may minimize your game and / or make it slower.

--------------------------------------------------------------------------------
3.5. Manual Errors


--------------------------------------------------------------------------------
3.6. Manual Addendum

--------------------------------------------------------------------------------
3.6.1 Domination mode

The goal of the game is to capture all the zones on the map - or hold the
most zones when the match time is up.
Your enemy's base zone can not be captured. Zones not held by either team
are neutral.

You capture a zone by outnumbering the enemy forces in that zone.
This progress goes faster the more teammates you have there.

A zone can only be captured if it is connected directly or indirectly to your team's base zone.
These connections are called supply chains, and appear automatically between all zones held by a team.

Although you can't capture it, an enemy zone can be neutralized even if you don't hold an adjacent zone.
This way you can cut your enemies supply chains to strangle their frontline forces.

The ownership monitor - underneath the minimap - shows all due battle data:
 - Friendly zones are blue
 - Enemy zones are red
 - Neutral zones are grey

If you stand in a zone that is held by your team and is connected to a supply chain, you can enter the equipment screen (default "I") to change gear. You buy equipment with the tactical points earned during the game.

Whenever you die you are taken to the status screen, where you wait to respawn. From here you can enter the equipment screen.
The status screen can be checked at any time (default ""TAB"").


################################################################################

4. Useful Web Sites, Contact Information and Technical Support

################################################################################

--------------------------------------------------------------------------------
4.1. Technical Support

Technical Support:

To get technical support, go to www.ubi.com <http://www.ubi.com> <<http://www.ubi.com>> and click "support" from the top toolbar.


--------------------------------------------------------------------------------
4.2. Useful Web Sites:

The official Ghost Recon Advanced Warfighter site:
    http://www.ghostrecon.com

To download DirectX 9.0c:
        http://www.microsoft.com/downloads

Latest ATI drivers:
    http://mirror.ati.com/support/drivers/powered.html

Latest NVIDIA drivers:
    http://www.nvidia.com/view.asp?PAGE=drivers

Latest Creative Labs drivers:
    http://www.americas.creative.com/support/welcome.asp?RD=download


#############################
###################################################

5. Legal Information

################################################################################

(c) 2006 Ubisoft, Inc.
Ghost Recon Advanced Warfighter is a licensed trademark of Ubisoft.

All Rights Reserved.

################################################################################

6. Copyright

################################################################################

LICENCE TO USE Ghost Recon Advanced Warfighter

Please read this Licence carefully before installing the game ("Multimedia Product").
This Licence is an agreement between you, the "User", and Ubisoft Entertainment and/or its licensors and/or its beneficiaries ("Ubisoft"), which grants the User the non-exclusive and non-transferable right to use the Multimedia Product.
This Licence is valid in every countries except in the U.S.A, Canada, France, Germany, Spain, Italy, The Netherlands, Denmark, Norway, Sweden, Finland, and United Kingdom.
By installing the Multimedia Product, the User is undertaking to respect the terms and conditions of the Licence.

1- The Licence

Ubisoft grants the User a non-exclusive and non-transferable Licence to use the Multimedia Product, but remains the owner of all the rights relating thereto.
Any rights not specifically transferred by this Licence remain the property of Ubisoft.
The Multimedia Product is licensed and not sold to the User, for private use.
The Licence does not confer any right or title to the Multimedia Product and cannot be understood as a transfer of intellectual property rights to the Multimedia Product.

2- Ownership of the Multimedia Product

The User recognises that all of the rights associated with the Multimedia Product and its components (in particular the titles, computer codes, themes, characters, character names, plots, stories, dialogues, places, concepts, images, photographs, animation, videos, music and text contained in the Multimedia Product), as well as the rights relating to the trademark, royalties and copyrights, are the property of Ubisoft and are protected by French regulations or other Laws, Treaties and international agreements concerning intellectual property.

3- Use of the Multimedia Product

The User is authorised to use the Multimedia Product in accordance with the instructions provided in the manual or on the packaging of the Multimedia Product.
The Licence is granted solely for private use.

It is not permitted:
- To make copies of the Multimedia Product,
- To operate the Multimedia Product commercially,
- To use it contrary to morality or the laws in force,
- To modify the Multimedia Product or create any derived work,
- To transmit the Multimedia Product via a telephone network or any other electronic means, except during multi-player games on authorised networks,
- To create or distribute unauthorised levels and/or scenarios,
- To decompile, reverse engineer or disassemble the Multimedia Product.

The User cannot sell, sublicense or lease the Multimedia Product to a third party.
The User can only transfer the Multimedia Product if the recipient agrees to the terms and conditions of the Licence. In this event, the User undertakes to transfer all components and documentation relating to the Multimedia Product. He also undertakes to delete any copy of the Multimedia Product from his computer. In this event, this Licence is automatically and immediately terminated.

4- Termination of the Licence

The Licence is effective from the first time the Multimedia Product is used.
It is terminated automatically by Ubisoft without notice if the User fails to adhere to the terms and conditions of the Licence.

5- Warrantee Limitation
Ubisoft warrants to the original purchaser of the Multimedia Product that the Multimedia Product will be free from defects in materials and workmanship for a period of ninety (90) days from the date of purchase.  The Multimedia Product is sold "as is", without any expressed or implied warranties of any kind, and Ubisoft is not liable for any losses or damages of any kind resulting from use of its products.  Ubisoft agrees for a period of ninety (90) days (or any other longer warranty period provided by applicable legislation) to either replace defective Multimedia Product free of charge provided you return the defective item with dated proof of purchase to the store from which the Multimedia Product was originally purchased or repair or replace the defective Multimedia Product at its option free of charge, when accompanied with a proof of purchase and sent to our offices postage prepaid.  This warranty is not applicable to normal wear and tear, and shall be void if the defect in the Multimedia Product is found to be as a result of abuse, unreasonable use, mistreatment or neglect of the Multimedia Product.

When you call, please be as specific as you can be about the problem you are experiencing and have the below details available:

- The name of the manufacturer of your computer system
- The brand and speed of the processor
- How much RAM you have
- The version number of windows you are using (if you aren't sure, right-click on the my computer icon on your desktop and select 'properties')
- The manufacturer name and model number of your video card, modem, and sound card.


The User recognises expressly that he uses the Multimedia Product at his own risk.
The Multimedia Product is provided as is. The User is responsible for any costs of repairing and/or correcting the Multimedia Product.
To the extent of what is laid down by the Law, Ubisoft rejects any warrantee relating to the market value of the Multimedia Product, the User's satisfaction or its capacity to perform a specific use.
The User is responsible for all risks connected with lost profit, lost data, errors and lost business or other information as a result of owning or using the Multimedia Product.
As some legislations do not allow for the aforementioned warrantee limitation, it is possible that it does not apply to the User.

6- Liability
In no event can Ubisoft be held liable for any direct, consequential, accidental, special, ancillary or other damages arising out of the use or inability to use the Multimedia Product, as well as out of the ownership or poor functioning thereof, even if Ubisoft has been advised of the possibility of such damages.
In particular, Ubisoft accepts no liability regarding use of the Multimedia Product contrary to the precautions for use set out in the manual and on the packaging.
As some legislations do not allow exemption from liability in the event of direct or incidental damages, it is possible that the aforementioned exclusion does not apply to the User.
This Licence to use the Multimedia Product grants specific rights to the User and he may have other rights depending on the laws in his State.
MUD FIM Motocross World Championship 2012

MUD FIM Motocross World Championship 2012


MUD FIM Motocross World Championship 2012


*******************************************************************************
MUD - FIM Motocross World Championship™ ReadMe File

February 29th, 2012

http://www.mudthegame.com/
********************************************************************************


********************************************************************************
GETTING STARTED - SYSTEM REQUIREMENTS
********************************************************************************

System Requirements

Operating System:  Windows®XP™ SP2, Windows®Vista™ or Windows®7

MUD - FIM Motocross World Championship™ can be configured to make the most out of your PC’s capabilities.

For a satisfactory gaming experience, your PC requires the following specifications:
Processor: Intel™ 2.4 GHz or similar
Hard disk space: 4,0 GB
RAM: 1GB
Video Card: NVIDIA® Geforce 8800 GT, AMD® Radeon™ HD 3870 or higher (it must be able to manage Pixel Shader 3.0) with at least 512MB of display memory.
Online Gaming:  Broadband internet connection

To enjoy the full graphic potential of MUD - FIM Motocross World Championship™ it is advisable to use a PC with at least the following specifications:
Processor: Intel™ Core 2 Duo / AMD™ Athlon 64 X2 or higher.
RAM: 2 GB on Windows®XP™, 3 GB on Windows®Vista™ and 4 GB on Windows®7
Screen: 19" LCD Wide Screen or bigger.
Video card: NVIDIA® GeForce™ 9000 series or higher, AMD® Radeon™ HD4000 series or higher (it must be able to manage Pixel Shader 3.0) with at least 512MB of display memory.

Laptop versions of these cards are not fully supported.

********************************************************************************
GETTING STARTED - INSTALLATION
********************************************************************************

Insert the game disc into your CD/DVD-ROM Drive. If you have enabled the Autorun
option, the game installation will start automatically. Otherwise, double-click
on the CD/DVD-ROM icon in the "My Computer" or "Computer" menu.
Find Setup.exe in the list of files and double-click on it to start the
installation process. Select “Install” to run the installation and follow
the installation wizard guide to successfully install the game on your computer.


********************************************************************************
GETTING STARTED - HOW TO PLAY ON MINIMUM REQUIREMENTS?
********************************************************************************

If you are playing on a PC that has the "minimum requirements" configuration:

1. Please close all unnecessary background applications.
2. Please make sure that you have the latest drivers for your video card
(see the video cards section below).
3. Make sure your PC has at least 3 GB free space once the game is installed.
4. Make sure your PC has at least 512MB of dedicated video memory.
5. Go to the "Video Settings" section of MUD - FIM Motocross World Championship™'s launcher:
- Set screen resolution to a lower value.
- Uncheck "Anti aliasing" (FSAA).
- Set "Terrain quality settings" to "Minimun".
6. Go to the "Config Graphics" section of MUD - FIM Motocross World Championship™’s launcher:
- Uncheck all options.
The Game may run on systems equipped with video cards with 256MB of display memory,
anyway stability is only vouched for the lowest supported resolution (640x480)
and minimum graphical effects.


********************************************************************************
PLAYING THROUGH A FIREWALL OR A ROUTER
********************************************************************************

This game uses the following ports for online play. If you have a firewall
available, make sure that it is configured in a way that allows the game to
communicate through said ports, whether they are receiving or sending data:

TCP Ports: 28910; 29900; 29901;

UDP Ports: 27900; 27901; 28900; 33766


********************************************************************************
TROUBLESHOOTING
********************************************************************************

- Video Cards
It is highly recommended to check your video card manufacturer's website and
download up to date drivers for your card.

For your convenience the addresses are listed here:
ATI: http://ati.amd.com/support/driver.html
Nvidia: http://www.nvidia.com
Intel: http://downloadcenter.intel.com/Default.aspx

- Videos playback
Please make sure that you have installed the latest version of Windows Media
Player http://www.microsoft.com/windows/windowsmedia/default.mspx

- Multiplayer
Please make sure you signed into GAMESPY with an active account name and password
http://www.gamespy.com/

- ALT+TAB
Using the ALT+TAB key combination to switch between applications may cause
problems.

- Audio
"Audio device is not working properly or is not ready":
if your PC uses UAA (Universal Audio Device) - HDA (High Definition Audio) drivers
please make sure that your speakers or headphones are connected to your PC before
you launch the game.

- ENTER key doesn't work
On certain ACER laptops when the NUM LOCK key is ON the ENTER key is not recognised.
Please make sure the NUM LOCK key is OFF.


********************************************************************************
KNOWN ISSUES
********************************************************************************

It is reccomended to install the game using an account with administrator rights.


********************************************************************************
SUPPORT
********************************************************************************

Please visit our website http://www.blackbeangames.com/ and navigate to our
support page to find the right contact for your country.
You can also send an e-mail to customersupport@blackbeangames.com

Also please make sure that your computer meets the minimum system requirements,
as our support representatives will be unable to assist customers whose
computers do not meet these criteria.

Whenever you contact the Technical Support Department, please include the
following information or have it available if you are calling:

Complete product title (including version number)
Exact error message reported (if applicable) and a brief description of the
problem you're encountering.
Processor speed and manufacturer
Amount of RAM
Operating system
Video card that you are using and amount of RAM it has
Maker and speed of your CD-ROM or DVD-ROM drive
Type of sound card you are using

********************************************************************************
Copyright Information
********************************************************************************

MUD - FIM Motocross World Championship, "MUD" is a registered trademark of Milestone srl. Published by Milestone srl, under its registered trademark "Black Bean". An official product of the FIM Motocross World Championship, under license of Youthstream Group Lda. Developed by Milestone S.r.l. All Rights reserved. Manufacturers, bikes, names, brands and associated imagery featured in this game are trademarks and/or copyrighted materials of their respective owners. MX1® and MXoN® logos are trademarks of Youthstream Group Lda. MX-Life.TV® is a trademark of Youthstream Media s.a. All rights reserved.

This product contains software technology licensed from GameSpy Industries, Inc. © 1999-2012 GameSpy Industries, Inc. GameSpy and the "Powered by GameSpy" design are trademarks of GameSpy Industries, Inc. All rights reserved.

Dolby and the double-D symbol are trademarks of Dolby Laboratories.

This product is powered by the EMotion FX character animation system; Copyright © 2001-2012 MysticGD.
All rights reserved worldwide. www.emotionfx.com

Warning: Do not imitate the riding and movements shown in this game. The racing and tricks in this game are intended to be fantasy. And remember, when riding a motorcycle in real life, always ride it safely.
 
Support : Creating Website | Johny Template | Mas Template
Copyright © 2011. Game COMPUTER 3D PC DVD CD - All Rights Reserved
Template Created by Creating Website Published by Mas Template
Proudly powered by Blogger